I know I have it good when getting a quality, hassle free, cup of coffee, is one of the biggest stresses in my life.
Back in Philadelphia I used the Keurig coffee maker for my
daily dose of coffee. I occasionally used
the prepackaged k-cups when friends gave them to me (thanks Drew) or if I
decided to splurge at the grocery store.
Otherwise, I filled the reusable Keurig coffee pods with Starbucks or La
Colombe coffee, hit the start button, and in a minute or two I would be on my
way.
I was never convinced that the Keurig provided a superior
tasting cup of coffee. But it was quick
and convenient, so I rarely gave it a second thought.
Rachel’s parents brought a Keurig coffee maker to Ecuador. They don’t sell the prepackaged k-cups here, so
I filled the reusable Keurig coffee pods with local coffee. But it has never worked correctly. The ground coffee sold in stores was of the
espresso grind. This grind was too fine
for the machine causing only a few ounces to drip out with each brew
cycle. The quickness and convenience of
the Keurig was gone. Instead of a minute
or two for a cup of coffee, it took ten.
The longer I waited the more I became aware of not only the annoyance,
but also the mediocre flavor that the machine produced. I noticed the excessive grit left at the
bottom of my coffee cup and the cloudy flavor that overwhelmed each sip.
I put everything in my life on hold, which wasn’t difficult
to do, and went on a search for the perfect coffee machine to replace the
Keurig. I found the Aero Press. It was affordable, around $30. It was easy to clean, a cinch to use,
produced an excellent cup of coffee, and was light and easy to transport. This last feature was important because my
mom would be bringing it from the U.S., and we had already asked her to bring two
fifty pound bags filled with essentials like jars of peanut butter, pistachios,
almonds, diapers, and about fifteen pairs of shoes for Teo, verifying Rachel’s
shoe fetish. You’re the best mom.
The Aero Press arrived, along with the other goodies, and I
couldn’t wait to take it out of the box.
It felt like Christmas. The
simple device had six pieces, and
some included paper filters. I was not
the technical type, and thought this might be too difficult for me to figure
out. I still needed Rachel’s help to plug
the DVD player into the TV. I was
doomed. I wondered if I made a mistake
and should return to the Keurig with my head between my legs, begging for it to
have me back.
I took a deep breath, and read the trusty instructions. I could do this, I told myself. There were only seven easy steps. After a few
dry runs I gave it a try. (See
demonstration below.) And my life would
never be the same. The Aero Press saved
me from a near stress induced mental breakdown, and being shipped off to one of
those Ecuadorian lunatic asylums. I
would be forever grateful.
The process was easy.
If I could do it. Anyone could do
it. There were no special techniques or
barista training necessary. From start
to finish, with clean up included, the process took 3 minutes and 35 seconds. Don’t get me wrong, it was more involved than pressing a
button on the Keurig. But the coffee was
far superior, and worth the extra time.
The basic cup of coffee from the Aero Press resembled an
Americano, which happens to be my favorite coffee brew and could also
present a bit of a bias on my part. The
coffee was clean and crisp and grit free while
presenting the unique natural coffee flavors inherent to the beans. The Aero Press cup of coffee was better than many
of the Americanos that I have had at specialty café’s made with thousands of
dollars of equipment and comparable to some of the better Americano’s that I
have had at some of the better café’s made with even more expensive equipment.
Now that this stress was solved I could move onto the
other pressing stresses in my life like not having graham crackers for the nighttime s’mores
by the campfire.
What machine do you use to brew your coffee?
Below is a Aero Press demonstration with some notes included. Let me know if you have any questions that
weren’t covered.
 |
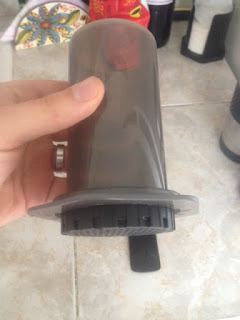
| The parts including a re-usable filter that I purchased separately. (The included scooper and funnel are not in picture. I forgot to include the scooper and don't use the funnel.) |
 |
| Place filter (paper or re-usable) into the filter holder and attach to the main compartment. |
 |
| Inside view with filter attached. |
 |
| Put one scoop of coffee with included scooper into the main compartment. |
 |
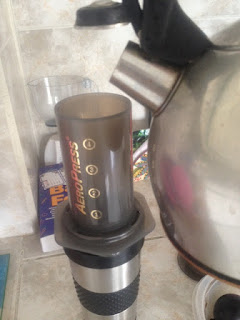
| Place compartment onto the coffee cup that you will be using. |
 |
| Fill with boiling water above line "2." If you put in too much water it will make the coffee bitter. |
 |
| Put plunger on top of main compartment and push down slowly. It will be more difficult to push with espresso grind. |
 |
| After all the boiled water is pushed into the coffee cup. The coffee cup may not be full. Fill to your liking with boiling water. |
 |
| Clean up is simple. |
 |
| Remove filter holder. |
 |
| Push down the plunger and force the coffee grinds (along with paper filter) into the trash. Obviously, save the re-usable filter and clean it. |
 |
| Rinse. Finished. Easy. Enjoy. |


This comment has been removed by the author.
ReplyDeleteGosh, that looks like a lot of work for a cup of coffee, but it's the small things that matter so much when you're far from home. Although we tend to use a cafetiere for our coffee, we do ask friends and relatives to bring particular coffee brands from home when they come to visit! Not so different after all.
ReplyDeleteDude you should've just stocked up on some classic roast man... i think there's a jar of it down in Toby's office. I'll go wake him up and see if there's any left.
ReplyDelete